FM HPE 102.4"
This game (number seven) at TGA was created in our engine Featherengine and Unreal Engine 5.
Contribution: Threading, Renderer, Plugin for Unreal, Frustum Culling, Voice & SFX recording
Time: 16 weeks at 50%
Team size: 18 members (6 programmers)
Unreal Plugin
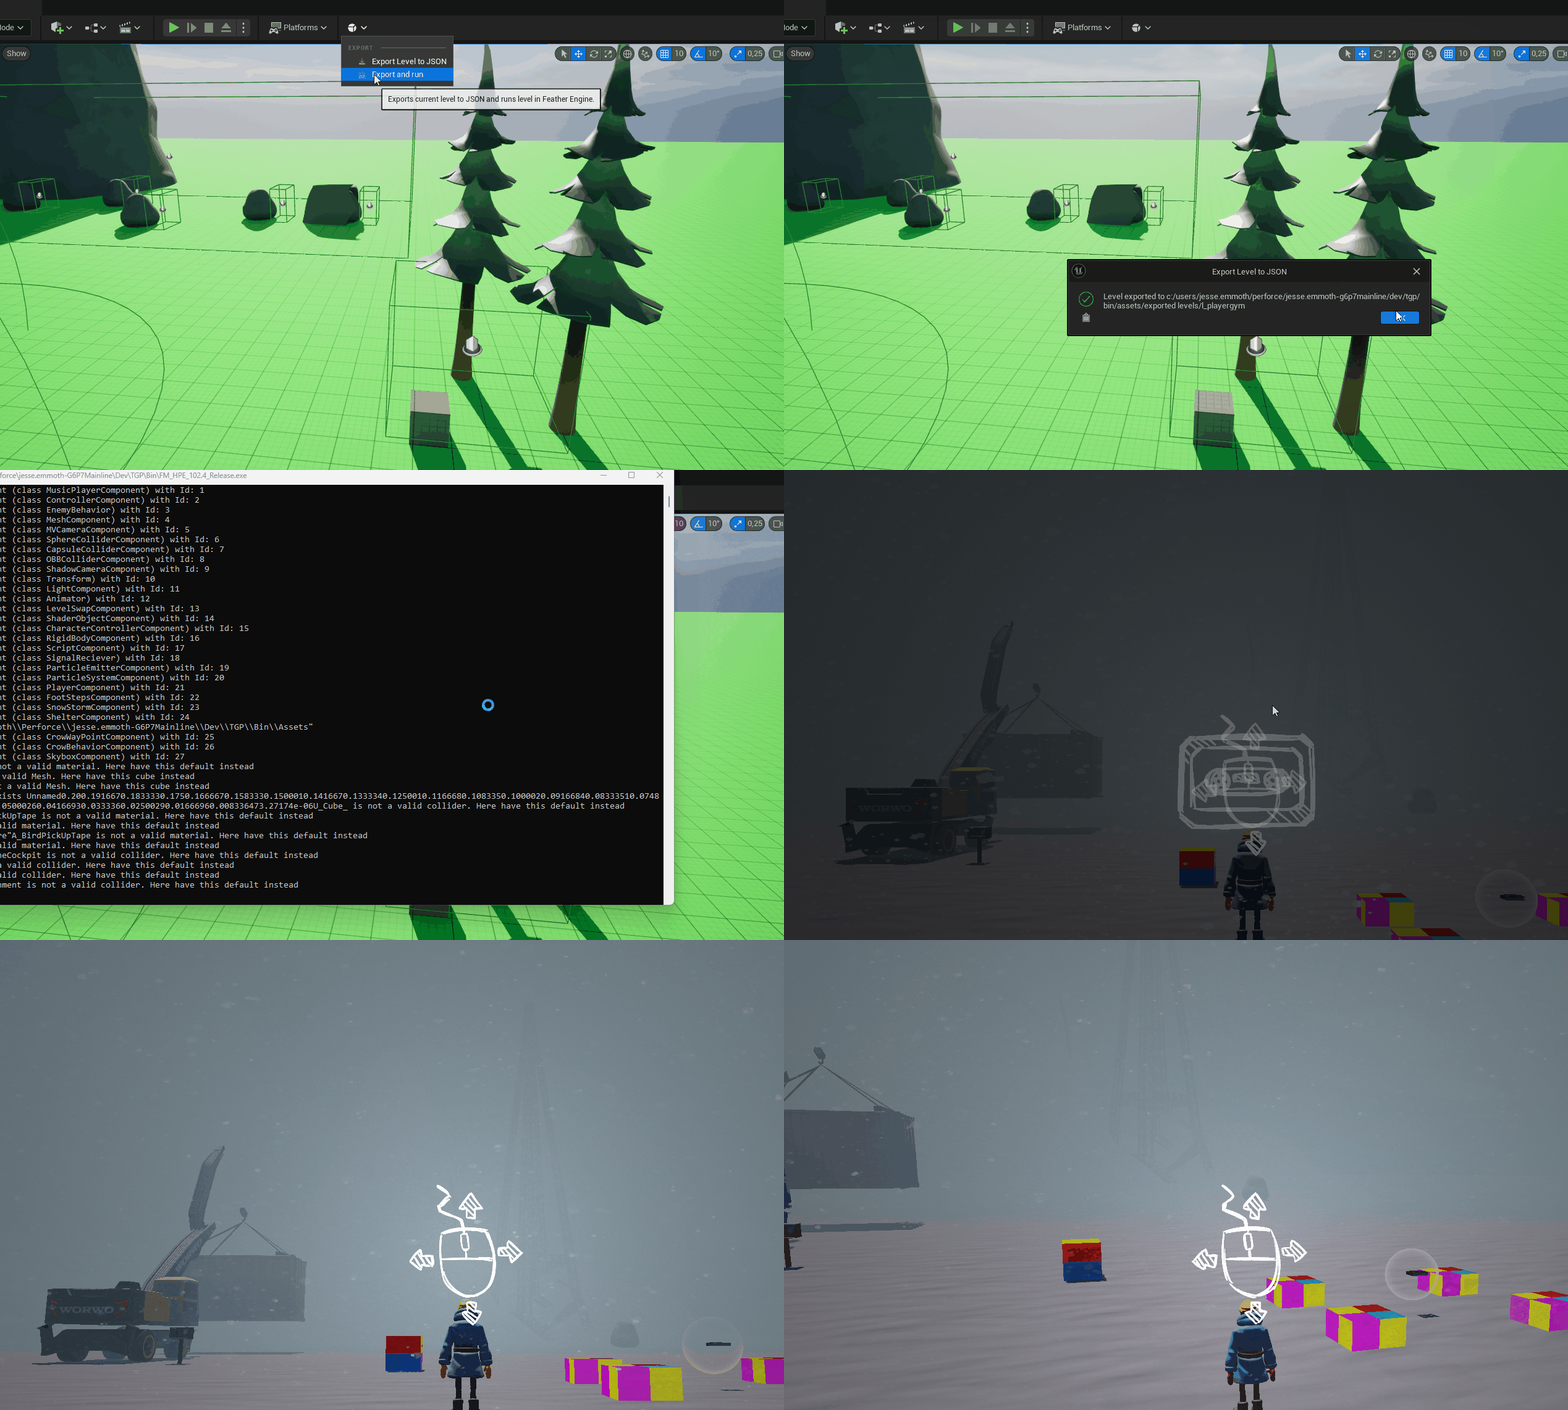
Since the team was using the Unreal Editor as the main tool for creating and propagating levels, we saw a big advantage of having a custom UI button in UE for launching a level directly in our engine.
Implementation
The general structure of this plugin was already existing through the level export plugin handed to us by our teachers at the start of project 6. My task was to expand it with the ability to not only export the current level but also start in directly in our own engine.
The way I got this to work was pretty straight forward. Within the plugin code I could simply create an external process and send arguments through the command line. On the engine side of this I needed to take care of those arguments, bypass some menus and
splash screens and then all was done.
At least I thought it was but I was wrong.

Fast level iterations through UI Button in Unreal Engine

What I learned
This feature meant a lot of interaction with our level designers which really taught me much about how to deliver software that meets specific requirements and especially how to keep a piece of software safe and always working.
I encountered a lot of struggles where the plugin would not work on some specific computers, string arguments being too long, assets in levels crashing the engine and so on. Solving these gave me valuable experiences on how to write code that won't just quit if something goes wrong (by for example prompting the user to find a missing file). I really got a hands-on experience of how valuable it is to give good information to the user!
Threading
I worked on the threading situation during this project. Up until this point our whole engine ran on the main thread (apart for dispatching a thread when loading a level). That is, the update loop and render loop where basically running one after the other every frame.
Implementation
The implementation we ended up with is a triple buffer solution with a central point of communication between the threads (the Renderer class). The Renderer uses a pointer to execute all graphics commands in the render list while the update loop pushes graphics commands to an update list as fast as it can. The third list, intermediate list is where both threads fetches a fresh list to start executing/pushing to.
This pattern results in both threads being well decoupled and enables us to basically have both threads out of sync (depending on how we choose to react to an update frame being faster than a render frame and vice versa).

The Renderer class implementation
What I learned
While implementing the renderer class I encountered all sorts of struggles (dead locks, race conditions, graphical artifacts etc.) related to threading in general and had to handle them. This taught me a lot about how to share data between threads (or should I say, not share data between threads..) and especially how much threading can boost performance in a game.
Rendering Stages
One difficulty we had during the previous projects was the fact that objects had to be ordered according to how they should be rendered. That is, an object with a component being rendered "deferred" could not also have another component rendering "forward". Both component specific render functions would be called from the same render function in the game object and therefore these functions would end up in the same area of the graphical command list (and therefore use the same settings for the rendering pipeline).

Implementation
The solution for this problem included dividing a whole frame of rendering into various stages and connecting these stages to actual command lists. Instead of en entity or component blindly pushing rendering data to the Renderer ("please render this data") they where now able to be a little more specific ("please render this data in a forward manner!").
This resulted in very little change on the front end side and in more control of the rendering pipeline being transferred to the Renderer class.

All code changes needed to use Rendering Stages where to specify a RenderQueueStage when pushing a command.


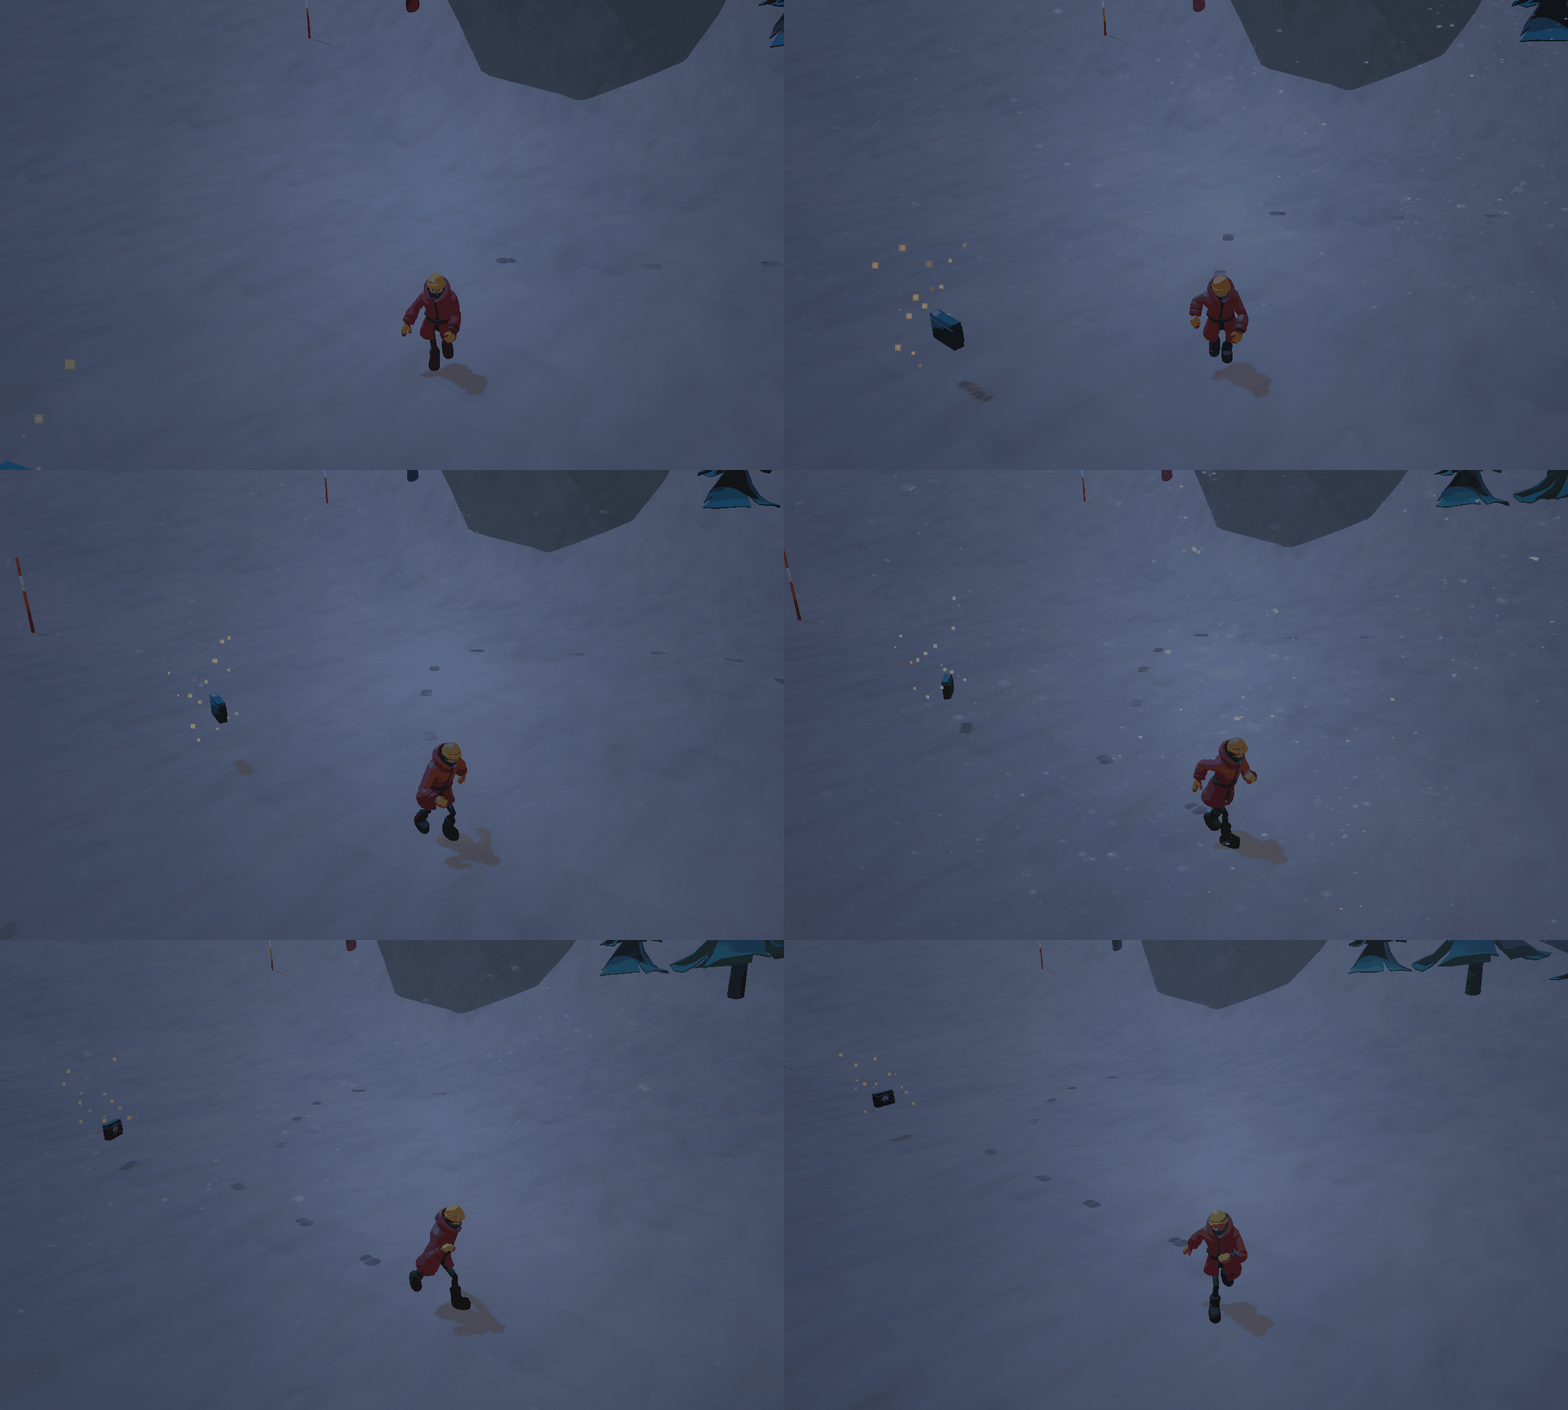
FootstepsComponent class rendering through a different state of the pipeline, but from the same object render call.
(Character is rendered Deferred, Footsteps are rendered Forward)
What I learned
This development taught me a lot about structuring code and how to make a code base as modular as possible. During the work of changing every single implementation of graphical commands in the entire code base I also learned a lot about what is most valuable in different situations. Sometimes control should be exposed on the front side for more flexibility; sometimes control is better hidden away for ease of use.
Frustum culling
This was a task I revisited during this project after reading and researching more on the subject.
Implementation
The functionality for not displaying objects outside the camera frustum (and therefore skipping a lot of data being sent from through the CPU-GPU bus) was already apparent in code. However, the collision checking for deciding what was actually inside the frustum wasn't working properly.
I took on an approach of moving the objects into the camera space and performing the calculations there. This way I never needed to move the frustum planes around in the world with the camera; the frustum planes needed only be defined once.
The actual calculations where already defined in our math library (checking dot products from frustum plane normals and the object vertex - frustum vertex vectors, developed earlier in the math course at TGA) and once I had the frustum defined properly I could perform the culling with bounding boxes.

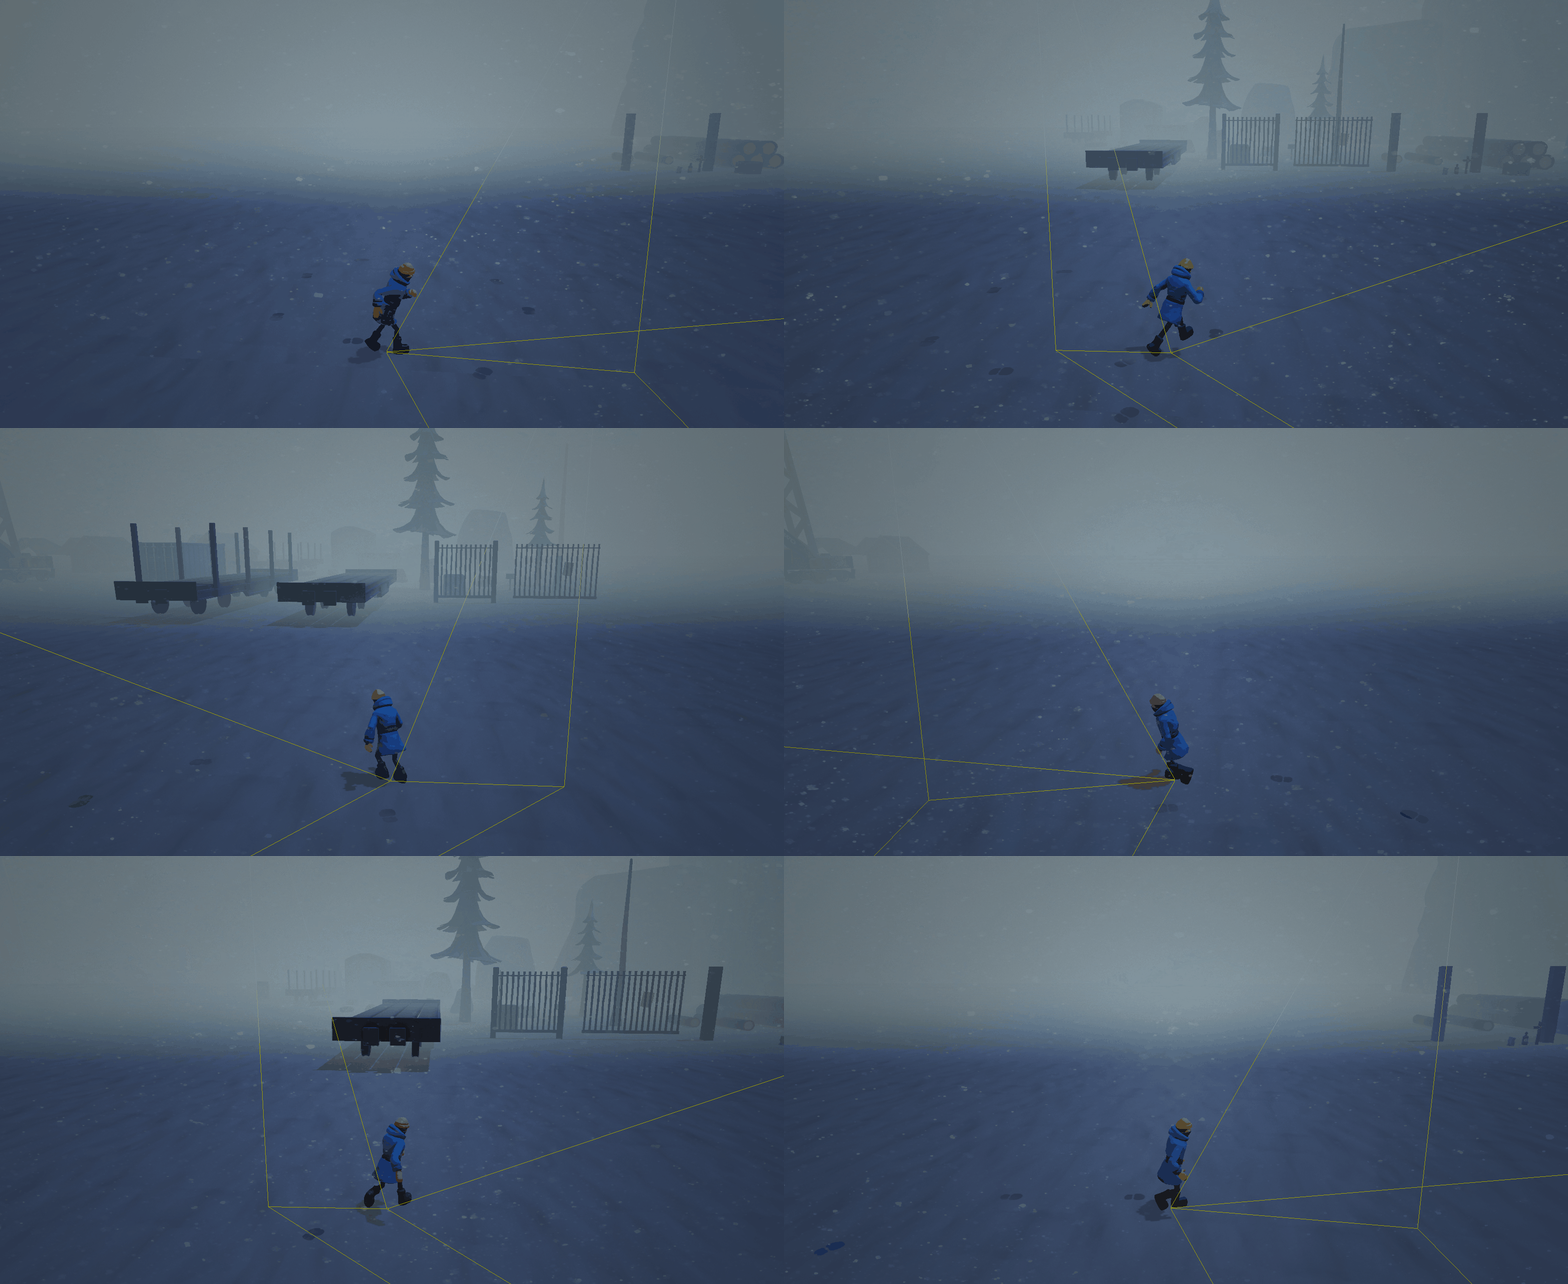
View Frustum Culling visualized through our debug rendering with character translation
What I learned
I encountered a problem where pivot points on mesh assets didn't effect the generation of our in engine bounding boxes and by this resulting in incorrect minimum and maximum points for the objects.
Before finding what was really happening I was questioning my definition of the camera frustum as well as my calculations. This made me realize the importance of not making guesses when debugging and the importance of thoroughly studying the program behaviour before making quick fixes.

Audio
Voice recording
A main feature in this game is picking up and listening to audio tapes. I decided to create these audio assets from scratch in my studio.
Sound effects & Foley
A big portion of the sound effects where created from real recordings with a microphone. Much of the sound is created in the post production stage where whipping with a tea towel can become of a bird's wing flaps or pouring sand can become footsteps in the snow.
Drinking from a bottle, Zipping up a Jacket, Crow wing flapping, Crow shouting in air, Heavy wind in ears
What I learned
One struggle I had was making sound effects created by others work with the ones I created myself. This can happen, i suspect, if one sample have gone through some serious compression and lost dynamic range or high frequencies.
I found that as a user you can easily tell the difference when one sound effect originates from a different source and this emphasizes the power of post production and being able to manipulate audio.
A short sample from audio within the game
Sample of music from the game